A few months ago, I figured out that I can create and share photo streams and albums using my iPhone. More seasoned iPhone users probably knew this but I usually don’t realize features exist until I need to use them (we won’t go into the fact that I’ve had my phone for 2+ years and just figured this out in March). It’s good thing I discovered this option, too, since it’s made collaborative photo projects exponentially easier. It’s wonderful to just send over a whole album with one notification rather than over several texts. It’s particularly helpful if you have several people you want to share pictures with or if you all want to share pictures from the same event.
It also saves time, which is nice.
I had a brief conversation with Steph explaining what to do and figured it would be a good idea to write a whole post just in case someone else didn’t know you could do this and wanted to. So here we go.
Step 1
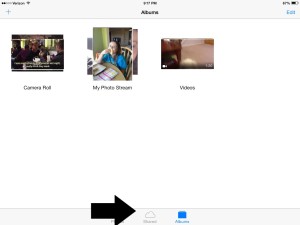
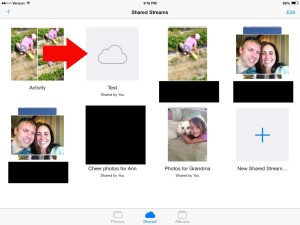
Open the photos icon and select the shared icon on the bottom menu (the cloud picture)
Step 2
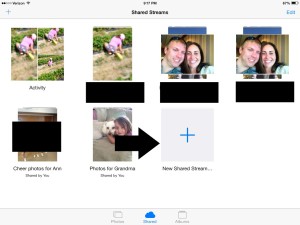
Create a new shared stream by tapping the plus sign
Step 3
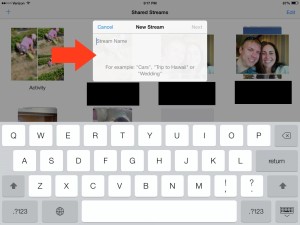
Name the new stream and then tap “next”
Step 4
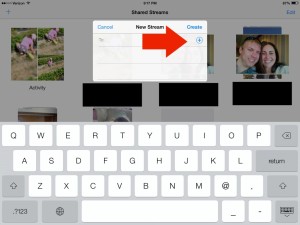
Invite people to join the stream by typing their email, phone number, or using the plus sign to invite people from your contacts list. Then tap “create”
Step 5
Verify that the new stream has been added to your shared streams.
Step 6
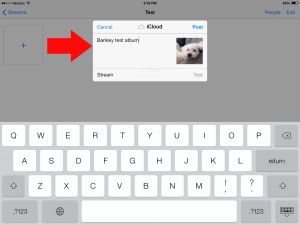
Start adding pictures by tapping the plus sign to the left of the text box. You’ll do this before you get the box and then you’ll select “done” and then you’ll get this box. Add comments if you want and then select “post”. You should return to the main album page, with the photos you selected added to it. You can see the example with pictures in step 8.
Step 7
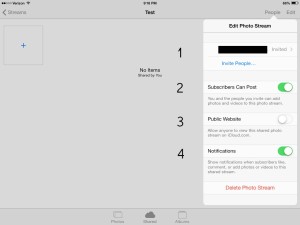
Once you’re in the main album, you can edit the photo stream (I took this capture before I added pictures. I probably should have done it the other way around but I just noticed that I didn’t). Tap “people”, and you’ll get the following options:
1. Invite more people later on, or add those you forgot on the initial invite.
2. Allow subscribers to the stream to add videos and pictures as well.
3. Create a custom, private URL that allows anyone to see the stream (this is for non-iPhone users mostly).
4. Get notifications when people alter the photo stream with comments, likes, or adding their own photos.
Step 8
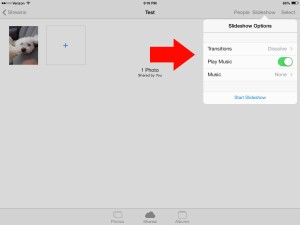
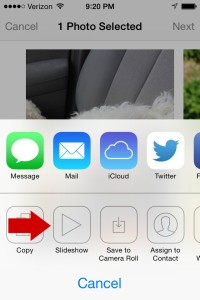
Play around with the slideshow settings (I took this screen capture after I added the pictures so if you need a reference for step 6, here it is. You can change the transitions between slides and add music. That’s all you can do with my devices but the newer ones might have more options.
If you’re doing this on your phone, instead of the screen above, you’ll get something like the screen below and you’ll use the arrows at the bottom to access the slideshow settings. On the main screen for the stream, slide over to “people” to access the settings described in step 7.
And there you go! Follow these steps and you’ll be able to share photo streams in no time!
