Jana Says

Living life from cover to cover

  • About Me
    • Contact
  • Reading
    • Judging Covers
    • Interview with a Bookworm
  • Life Happenings
    • Playlists
    • The Aldi Experiment
  • Mental Health
  • Show Us Your Books

The Townhouse Pioneer Kitchen Diaries: Margarita Guacamole

April 29, 2014 by Jana 8 Comments

Over the weekend, I posted on the Townhouse Pioneer Facebook page that I both eliminated food waste and made due with what I had on hand (two important pioneer values) by substituting margarita mix for olive oil in a recipe for guacamole. My friend Jenniemarie asked for the recipe, I told her I’d post it so here we go.

Oh, quick side note–I have no picture because it was a last minute substitution/decision. Also, guacamole is ugly. Delicious. But ugly.

Townhouse Pioneer Easy Margarita Guacamole
Ingredients:
2 ripe avocados, peeled and pitted
1/4-1/2 tsp salt
Juice from 1/2 lemon
1/2 tbsp jarred chopped garlic (can substitute with fresh. I don’t. I’m lazy. You can also use less if you don’t like garlic)
1/2 tbsp margarita mix (no tequila. Although I might try it next time)
Optional: finely chopped red onion, diced tomatoes

Directions:
1. Mash the avocados with salt and lemon juice
2. Add the remaining ingredients
3. Serve with crackers, chips, on thick, crusty bread or eat with a spoon from the bowl. Your call.

Note: guacamole browns pretty quickly so you’re going to want to eat this within 2 days. It probably won’t last that long but just in case.

The original recipe I ordinarily make would use olive oil instead of the margarita mix, and it also calls for fresh cilantro but I didn’t have any so I just left it out. It tasted just fine.

So that’s it. Simple, easy, and delicious. I recommend it.

How do you make guacamole?

Filed Under: Cooking, Life, Recipes Tagged With: living the life, pioneer traits, recipes

Make your own mending basket

April 28, 2014 by Jana 14 Comments

One of the most essential pioneer skills is sewing. Without sewing, the pioneers would be naked, cold, have no curtains to separate rooms or block the sunlight, and a big part of their socialization would disappear (quilting bees, for instance, provided pioneers with a practical social outlet. And, not only that, they pooled their resources in terms of manpower and materials to get things done). 

All of that would suck. 

Which is why I picked sewing as one of the skills I would focus on for this project. Thanks to home ec in middle school, I already knew how to sew a button and a seam (which has come in handy on many, many occasions) and I recently remembered that I know how to sew throw pillows as well. That’s it, though. I cannot sew anything else. I’m working on it, though, and I’ll share many of my disasters attempts as I work through them. 

However, for today, we’re going to focus on mending. Mending is essential to the pioneer value of frugality as well as the making due with what you have. Sometimes, we’re so quick to throw something away because of a small hole or a missing button that we forget how easy it is to fix with the right materials. If you don’t know how to sew, YouTube is ridiculously helpful for learning how to do things like sew a button. And I don’t know about you, but when I find a pair of jeans that finally fits right, I don’t want to have to look for another pair simply because the button fell off or the hem starts to fall out. I’d rather take a few minutes and fix what I have because this also means I don’t have to shop (which I utterly detest). 

If you’ve read the Little House or any other pioneer life books (fiction or nonfiction), you’ll read (a lot) about mending baskets. They’re the most convenient way to keep all of your mending supplies in one place so when you do need to fix something, you just have to find one box instead of 42 separate items. If you don’t want to create a mending basket, you can buy one of those sewing kits that has a few types of thread, needles, and a small tape measure. That’ll work, too. For today’s post, though, we’re going to take a peak at what I keep in my basket because I wanted a little more than the premade kit. 

This is what my mending basket (well, box, really) looks like:

photo (14)

In case you can’t tell what everything is, I have a bunch of different colored thread, some marking pencils for hems, pins to hold stuff in place, and a whole bunch of needles. Then I put all of that stuff–which I purchased at Michael’s for probably less than $15–in a plastic box I found at the dollar store. 

I also have this stuff, too, as well as an entire box of buttons and snaps I’ve collected over the years (you know how when you buy a button down shirt and it comes with extra buttons? I hoard those in an old perfume tin):

photo (15)

Having these supplies on hand has saved my ass (and my wallet) on more than one occasion. I’ve been able to fix so many items from blankets to doll clothes to jackets. And, having these basic skills, means I have the foundation to work on bigger projects. 

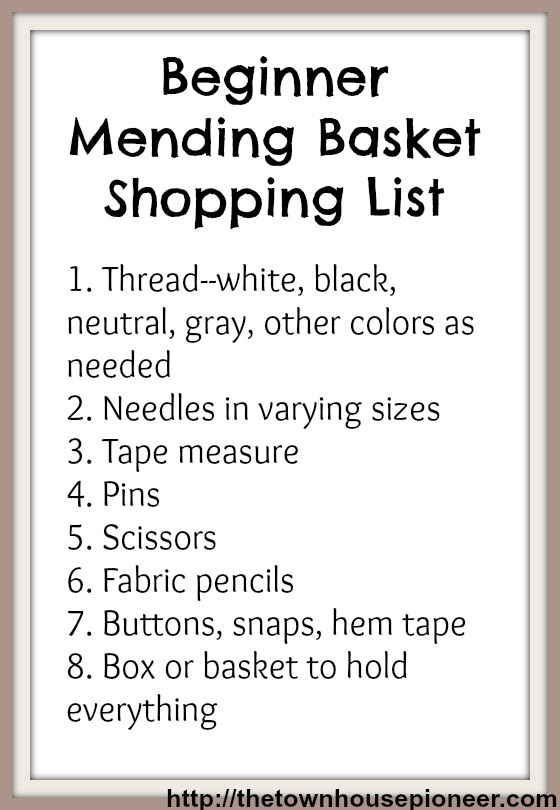
If you’re interested in starting your own mending basket, here’s a quick shopping list:

shopping list

Quick cheat: I put hem tape on the list. If you don’t trust your sewing skills, there’s iron-on hem tape you can use instead. You’ll still have to measure and pin, but no sewing involved. Just a bit of ironing. 

So that’s it. That’s all you need to do to create your own mending basket. And if you shop at Michael’s to buy your stuff, they usually have coupons so you can save even more money. 

Good luck!

Filed Under: Life, Pioneer Project, Sewing Tagged With: homemaking, living the life, pioneer traits

The Pioneer Kitchen Diaries: Homemade Butter

April 23, 2014 by Jana 14 Comments

It’s been awhile since I posted an actual project update. That’s mainly because I’ve been too lazy to work on any but this week, I decided I’d had enough of that. And also it’s spring break so I figured my daughter and I could kill spend an hour or two working on one.

I went through my Pinterest board of projects ideas and settled on a fairly simple and relatively inexpensive one–homemade butter. The timing was perfect, too, as I’m finishing up Little House in the Big Woods for next week’s book club discussion and Laura painfully details the butter making process. So it worked for ease, theme, and cost.

Since I don’t own butter churn and have absolutely no desire to ever own one, I used the instructions for making butter in a stand-up mixer (which I only have courtesy of my mother-in-law’s hand me down). I opted out of coloring the butter orange like they did in the book because shredding a carrot and combining it with boiling milk sounded like unnecessary work and more dishes to clean. Yellow butter works just fine for me.

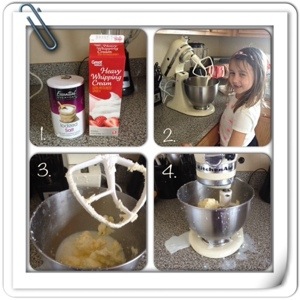
Here’s what I did:

20140422-191657.jpg

  1. Ingredients–3/4 tsp salt, 1 quart heavy cream
  2. My daughter making a rare appearance on the blog as my helper pouring the cream into the mixing bowl
  3. The butter starting to form and separate from the milk.
  4. The mess that happens even if you use a towel and cover the mixer because towels have a limit on how much they can absorb.

Not pictured: the whipped cream phase that happens before the cream turns to butter, draining the buttermilk through a colander and rinsing the butter. Not sure why this last one is necessary but the directions said to do it and I did. Also not pictured are my disgusting, greasy hands.

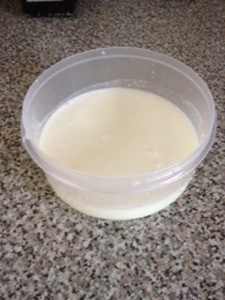
After you mix everything up (takes about 20 minutes and you need to check it fairly frequently), you get butter that sticks to the paddle and buttermilk in the bottom of the bowl. Then you drain the milk through the strainer and it looks like this. Right now, it’s stored in a glass container in my fridge and if you have a recipe that involves buttermilk so I can use it up, please share.


20140422-192314.jpg
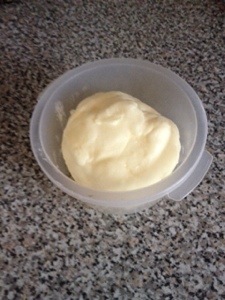
This is the actual butter. After I washed it and rung out what was left of the buttermilk, it was kind of like a butter ball. I left it in a lump as I saw no need to mold the butter into anything fancy because I don’t care about that shit. And aesthetics mean nothing when you make butter that actually tastes like butter. Which I did, y’all.


20140422-192720.jpg
This project was amazingly easy, albeit messier than I would have liked. Next time, I’ll still use the towel but lower the speed to prevent splatter and decrease the mess (and by extension, clean up time). And as far as cost, it’s really no more expensive ($4.49 for a quart if heavy cream at Walmart) than buying a pound of already made butter. 

I cannot imagine having to do this with a butter churn. I completely understand how it took them all day to do.  Before I was all “how the fuck did it take them all day? This is so easy! How slow did they move?” But now, having done it myself, I get it. I saw the effort my badass stand up mixer had to put forth to get it done. And just letting it go for the 20 minutes or so before I had to rinse, separate and mold felt like it took an eternity. Having to do it with my own strength and patience? Forget it that. My family would never eat butter.But if you have a stand-up mixer or even an electric hand mixer, I’d recommend giving this a try. 

Oh, and the butter lasts about 4 weeks. I think. I’ll let you know in 4 weeks. 

Have you ever made homemade butter? Did you follow similar directions?

Filed Under: Cooking, Home Decorating, Life, Recipes Tagged With: food, homemaking, living the life, projects

Tips for beginner container gardening

April 14, 2014 by Jana 8 Comments

One of the reasons I started this project was to prove that you do not need 846 acres to live a more pioneer-like life. I wanted to show that you can live in a townhouse (which is what I lived in when the idea originated), apartment, house with almost no yard space, or any other dwelling and still develop the skills that helped keep the pioneers alive. Particularly gardening. Because, you know. Food. 

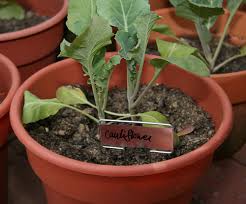
Not my plant. I wouldn't grow cauliflower. I found this picture on Flickr.
Not my plant. I wouldn’t grow cauliflower. I found this picture on Flickr.

Having lived in a townhouse with very strict thorough and comprehensive HOA rules for 9 years prior to moving into our house, I know how hard it is to want to be more self-sufficient in your food production yet not have the ability to do it. Fortunately, my husband and I found the best way to get around the rules and limited space. 

Container gardening. 

Container gardening is absolutely perfect for not only beginner gardeners but also those who can’t plant food or honestly, are too lazy to do it (which is me. Completely. All that digging and raking and shit? No thank you). It also gives you the satisfaction of growing some of your own food without having to deal with pain in the ass HOA board members or having to lose some precious backyard space, although you will have to deal with losing some patio or balcony space. Unless you use a window box and only plant things like herbs and spices. Which is fine, too. Fresh herbs and spices are awesome. 

But let’s say you decide to do some container gardening and use a window box for something pretty like flowers or as a trap for Twiddlebugs. First, I commend you on making a good choice. Second, if you’re going to have a container garden, there are some lessons I learned from years of doing it watching my husband that I think will make your garden successful:

container gardening

  1. Pick one to two plants. Three at the most. Any more than that and your containers will start to overtake your small space and then it becomes some sort of vegetable jungle instead of a garden. No one wants to battle a rogue tomato plant on their way to work. 
  2. Pick plants you will actually eat. Radishes may be easy to grow but if you’re not going to eat them because you’re not a Fraggle, it’s a waste of money and labor. The point of a garden is to have fresh fruit and vegetables and save money at the supermarket. That doesn’t happen if you’re planting stuff you won’t use. It’s food waste and money waste, and your pioneer friends would be upset.
  3. Evaluate your space. You’d have to do this with a regular garden, too, but for container gardening, you need to know precisely how much room you have, which spot is the best, and how much sun it does or doesn’t get. This will also impact what plants you grow. If the only spot you have is mostly shady, you can’t grow a plant that needs full sun. So after you evaluate your space and know what you can grow, make sure you’re paying attention to the necessary growing conditions of the plants you select.
  4. Pick plants that will produce a lot. If you are growing only a few plants, you want them to give you a whole lot of food. Plants like tomatoes, cucumbers, peppers, strawberries are known for being great producers. But have a plan for the extras to avoid food waste. Some suggestions: start canning, give some away or sell some to your neighbors in a quasi-farmer’s market setting. 
  5. Get creative. Even if you have a tiny, tiny balcony and don’t want to give up space, you can still garden. Besides using the aforementioned window boxes, did you know that there are tomato plants that grow upside down? You can also grow similar types of plants in one container, giving you variety without the real estate. How about some hanging plants? A little creative planning can give you a good garden and enable you to still have some room.

Don’t forget: even though you’re growing the plants in a container, you still need to water, prep the soil, prune, and do all of the other stuff you would if you had planted them in the ground. Fortunately, it’s not nearly as much work. But it is still work. Work that’s worth it, though. Because anytime you can eat your work, that’s a good thing.

Have you done container gardening? What tips and suggestions did I miss?

Filed Under: Gardening, Life, Pioneer Project Tagged With: food, living the life, plants

It’s not pretty, it’s our garden

April 7, 2014 by Jana 15 Comments

Two months into this project, I’ve learned 3 key lessons:

1. Being a pioneer is hard work. Dirty, grueling, get your hands dirty hard work.
2. Being a pioneer takes a lot of patience. Like, a lot. More than I have some days.
3. Being a pioneer is pretty damn expensive, particularly when you’re just getting started and you need to buy materials. No wonder it took the Oregon Trail travelers a year to save the money to get started.

Case in point: our garden.

When I decided I wanted to embark on the adventure that is pioneer living, I knew I had to get my husband on board. Mainly because I needed his support on some of the skills I’m attempting to learn (we’ll talk more about this another day, but let’s just say yarn is an asshole) but also because I needed him to do the literal and figurative heavy lifting on putting together our garden. Because gardening was essential to pioneers. You know, so they could eat and not starve to death.

So of course I had to do it.

Fortunately, the husband enjoys gardening whereas I enjoy the concept of gardening. So we had a family discussion regarding what we were going to plant but I stepped back and let him do whatever it was he needed to do to get it started. Because, quite frankly, I’m better off staying away from plant life. I am the grim reaper of the plant world. I’m pretty sure plants begin to die if I even think about going near them.

And let me just say this–Friends, if you have a spouse who is overly enthusiastic about gardening and you truly don’t give a shit, you will have to endure many conversations about tilling, amending soil, early crops, late crops, composting, containers, bugs, fertilizer, and more topics that will bore you to literal tears. I have found the best way to handle the situation is to smile, nod, and say “whatever you need to do is fine with me”.

Giving the husband free reign over the garden made him almost as happy as if I told him I assembled Tiger Woods, Cal Ripken, and John Elway and they were all going to play golf at Augusta National. He took the authority and ran with it. At his insistence, all winter, we worked on our compost pile, planned where in our backyard we’d have the garden, and he even created a very detailed chart/blueprint with the different plots, plants, and layout.

This made me realize it was a good thing he was in charge of this particular project. Because if left up to me, we’d have approximately nothing accomplished.

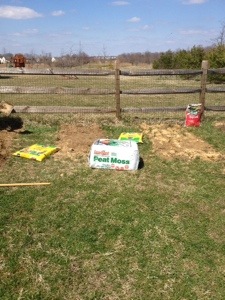
After what felt like an eternity of olanning and talking, the weather finally cooperated this weekend and we were able to get the plots dug and some of the seeds planted. Apparently, there are some seeds that need to be started inside rather than outside and we worked on that, too.

20140407-141823.jpg

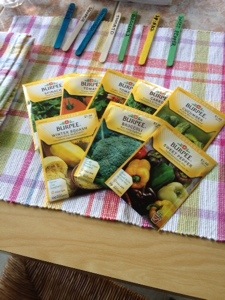
While he was digging, my daughter and I wrote out plant markers on Popsicle sticks so we know what plants are where:

20140407-141104.jpg

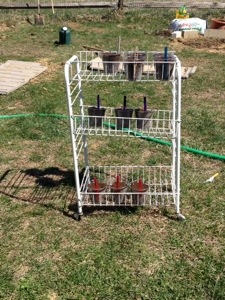
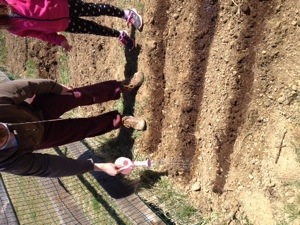
When he was done digging, this is what everything looked like (note: he still has 3-4 more plots to dig but apparently our backyard is crap and he needs a tiller. In a lucky turn of events, we finally don’t have to play for something and he’s borrowing one from a co-worker):

20140407-141425.jpg

Then we planted the seeds and he and our daughter watered them. I avoided this part because I really, really hate mud and having it on me makes me cringe. (Also, real men use a pink Dora watering can. Back off ladies, he’s mine):

20140407-141614.jpg

When it was all done, it looked like this. I know it doesn’t seem like much now but I’m hoping that in a few months, when I wrote a follow-up, you’ll see actual plants instead of just dirt. Excuse me. Soil.

Everything about planting the garden made me unhappy. The dirt. The money we had to spend to get it started. The endless waiting for the right time. The dirt. And while I know I’ll enjoy the result of this project, right now, it kind of sucks. But it did up the level of respect I had for the pioneers, particularly those who had absolutely nothing when they started.

So there’s that.

And just to prove I’m not the the only one who dislikes the process, here’s a picture of my cat, sitting under our barbecue, staying clear away from the actual labor part of gardening and watching approvingly. Because she’s knows how to get shit done.

20140407-143031.jpg

Filed Under: Gardening, Life, Pioneer Project Tagged With: family projects, living the life, plants, projects

  • « Previous Page
  • 1
  • 2
  • 3
  • 4
  • Next Page »
Jana

I'm Jana ...

A book reading, nail polish wearing, binge watching, music loving, dog owning, reluctant cheer mom.
Learn more ...
  • Bloglovin
  • Email
  • Facebook
  • Instagram
  • Pinterest
  • RSS
  • Twitter

Generic selectors
Exact matches only
Search in title
Search in content
Search in posts
Search in pages
Filter by Categories
Activities
beginnings
bills
bloggers
Books
budget
challenges
charity
Confessions
Cooking
coupons
Crafting
entertainment
Family
Family matters
food
Gardening
Giveaways
goals
Guest posts
guests
Home Decorating
Life
mental health
Money
Money Motivation
money moves
money tips
Money Tune Tuesday
opinions
parties
Pets
Pioneer Project
products
quotes
random
Random thoughts
recipes
Recipes
Relationships
savings
school
Sewing
shopping
Sidebar Shots
Uncategorized
work
writing

Archives

Reader favorites

Sorry. No data so far.

Show Us Your Books. Join the Link-Up. Talk Books the Second Tuesday of Every Month

Connect with Me

Subscribe to Jana Says

Jana Says
© 2017 by Jana Says. All Rights Reserved.
Crafted with by sasspurrella designs.

Copyright © 2025 · Lifestyle Pro Theme on Genesis Framework · WordPress · Log in