Jana Says

Living life from cover to cover

  • About Me
    • Contact
  • Reading
    • Judging Covers
    • Interview with a Bookworm
  • Life Happenings
    • Playlists
    • The Aldi Experiment
  • Mental Health
  • Show Us Your Books

The Townhouse Pioneer Kitchen Diaries: Margarita Guacamole

April 29, 2014 by Jana 8 Comments

Over the weekend, I posted on the Townhouse Pioneer Facebook page that I both eliminated food waste and made due with what I had on hand (two important pioneer values) by substituting margarita mix for olive oil in a recipe for guacamole. My friend Jenniemarie asked for the recipe, I told her I’d post it so here we go.

Oh, quick side note–I have no picture because it was a last minute substitution/decision. Also, guacamole is ugly. Delicious. But ugly.

Townhouse Pioneer Easy Margarita Guacamole
Ingredients:
2 ripe avocados, peeled and pitted
1/4-1/2 tsp salt
Juice from 1/2 lemon
1/2 tbsp jarred chopped garlic (can substitute with fresh. I don’t. I’m lazy. You can also use less if you don’t like garlic)
1/2 tbsp margarita mix (no tequila. Although I might try it next time)
Optional: finely chopped red onion, diced tomatoes

Directions:
1. Mash the avocados with salt and lemon juice
2. Add the remaining ingredients
3. Serve with crackers, chips, on thick, crusty bread or eat with a spoon from the bowl. Your call.

Note: guacamole browns pretty quickly so you’re going to want to eat this within 2 days. It probably won’t last that long but just in case.

The original recipe I ordinarily make would use olive oil instead of the margarita mix, and it also calls for fresh cilantro but I didn’t have any so I just left it out. It tasted just fine.

So that’s it. Simple, easy, and delicious. I recommend it.

How do you make guacamole?
Filed Under: Cooking, Life, Recipes Tagged With: living the life, pioneer traits, recipes

The Pioneer Kitchen Diaries: Homemade Butter

April 23, 2014 by Jana 14 Comments

It’s been awhile since I posted an actual project update. That’s mainly because I’ve been too lazy to work on any but this week, I decided I’d had enough of that. And also it’s spring break so I figured my daughter and I could kill spend an hour or two working on one.

I went through my Pinterest board of projects ideas and settled on a fairly simple and relatively inexpensive one–homemade butter. The timing was perfect, too, as I’m finishing up Little House in the Big Woods for next week’s book club discussion and Laura painfully details the butter making process. So it worked for ease, theme, and cost.

Since I don’t own butter churn and have absolutely no desire to ever own one, I used the instructions for making butter in a stand-up mixer (which I only have courtesy of my mother-in-law’s hand me down). I opted out of coloring the butter orange like they did in the book because shredding a carrot and combining it with boiling milk sounded like unnecessary work and more dishes to clean. Yellow butter works just fine for me.

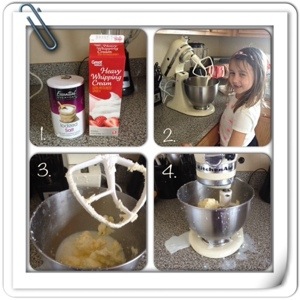
Here’s what I did:

20140422-191657.jpg

  1. Ingredients–3/4 tsp salt, 1 quart heavy cream
  2. My daughter making a rare appearance on the blog as my helper pouring the cream into the mixing bowl
  3. The butter starting to form and separate from the milk.
  4. The mess that happens even if you use a towel and cover the mixer because towels have a limit on how much they can absorb.

Not pictured: the whipped cream phase that happens before the cream turns to butter, draining the buttermilk through a colander and rinsing the butter. Not sure why this last one is necessary but the directions said to do it and I did. Also not pictured are my disgusting, greasy hands.

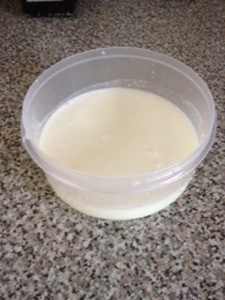
After you mix everything up (takes about 20 minutes and you need to check it fairly frequently), you get butter that sticks to the paddle and buttermilk in the bottom of the bowl. Then you drain the milk through the strainer and it looks like this. Right now, it’s stored in a glass container in my fridge and if you have a recipe that involves buttermilk so I can use it up, please share.


20140422-192314.jpg
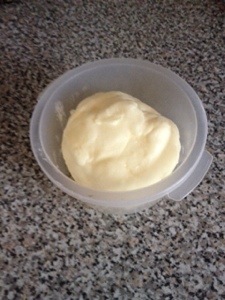
This is the actual butter. After I washed it and rung out what was left of the buttermilk, it was kind of like a butter ball. I left it in a lump as I saw no need to mold the butter into anything fancy because I don’t care about that shit. And aesthetics mean nothing when you make butter that actually tastes like butter. Which I did, y’all.


20140422-192720.jpg
This project was amazingly easy, albeit messier than I would have liked. Next time, I’ll still use the towel but lower the speed to prevent splatter and decrease the mess (and by extension, clean up time). And as far as cost, it’s really no more expensive ($4.49 for a quart if heavy cream at Walmart) than buying a pound of already made butter. 

I cannot imagine having to do this with a butter churn. I completely understand how it took them all day to do.  Before I was all “how the fuck did it take them all day? This is so easy! How slow did they move?” But now, having done it myself, I get it. I saw the effort my badass stand up mixer had to put forth to get it done. And just letting it go for the 20 minutes or so before I had to rinse, separate and mold felt like it took an eternity. Having to do it with my own strength and patience? Forget it that. My family would never eat butter.But if you have a stand-up mixer or even an electric hand mixer, I’d recommend giving this a try. 

Oh, and the butter lasts about 4 weeks. I think. I’ll let you know in 4 weeks. 

Have you ever made homemade butter? Did you follow similar directions?

Filed Under: Cooking, Home Decorating, Life, Recipes Tagged With: food, homemaking, living the life, projects

The Pioneer Kitchen Diaries: Sesame noodles with broccoli

February 24, 2014 by Jana 7 Comments

As I get deeper into this project, and the more research I do, the more I learn that there’s a pretty distinct set of pioneer values. And, as I learn more about those values (or, at the very least, create what I think are those values), the more I try to incorporate them into my daily life. Because at the end of this, I hope not only become more self-sufficient but change some of my ways of thinking.

One of the areas I’m working on a lot is food waste. Overall, my family does a decent job of not wasting food. Sure, there’s the occasional cucumber that might liquify or a container of leftover pasta sauce that sprouts some fuzzy friends or maybe a bottle of salad dressing that lives longer than it should. But for the most part, we’re good about not wasting food. When it does happen, and I have to do a major cleaning of my fridge and I throw out more food than I should, it bothers me. 

That happened this past weekend. And there was absolutely no reason it should have. And now I’m on a mission to make sure it doesn’t happen again (at least in the volume it did).

Because the pioneers didn’t have the option of food waste. They had to find a use for everything they had. There was no excess to just toss into the trash. They had what they needed, used it all in some way, and that was that. To start incorporating that into my life, I’ve established three ways to put our food to use and reduce food waste in my kitchen:

  • Leftovers
  • Composting
  • Repurposing

Recycling is its own entity and we do recycle everything we possibly can. My tree hugging, renewable energy field working husband wouldn’t have it any other way.

As far as the list, I’ll explain each one in detail in its own post (particularly the repurposing, which I know sounds strange. But think of it along the lines of popsicle stick crafts, macaroni art, or noise makers out of dried beans), and for this post, we’re going to talk about leftovers.

My family is big into leftovers. Not only does it reduce food waste but it saves money so there’s a double bonus to them. My husband and I eat leftovers for lunch most days and if there’s a big batch of something like rice, I’ll find a way to incorporate them into another recipe. That’s what I did with pasta.

I don’t know about you, but when I make pasta, I usually wind up making enough for 87 people. As we are a family of 3, we don’t need that much. So I typically find at least 2 recipes to make with a box of pasta or I leave the leftovers in the event that my daughter refuses to eat what I cook (the rule used to be if she didn’t like it, she got pb&j but she brings that for lunch every day. So now it’s pasta). Last week, however, I wanted to do something different that adding the noodles to soup or making two dishes to accompany the pasta. So I went through my trusty recipe binder (pics are forthcoming but it needs a major overhaul first) and landed on sesame noodles.

You seriously cannot go wrong with cold noodles in a peanut butter sauce.  And I had a lot of noodles.

Looks are deceiving. There's a lot of pasta in there.
Looks are deceiving. There’s a lot of pasta in there.

Then I pulled the rest of the ingredients out of the pantry.

photo
Pantry staples FTW!

And I mixed a few of the ingredients with the peanut butter.

photo (1)
Peanut butter, soy sauce, and broth.

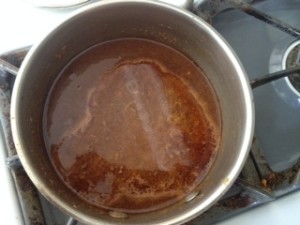
Then I added the rest and it looks a little gross but looks are deceiving.

photo (3)
Pay no attention to the burner that needs to be cleaned.

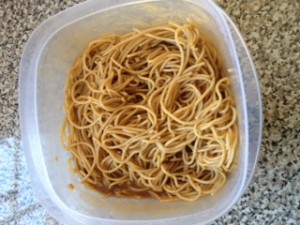
When the sauce thickened a bit and was smooth, I poured the peanut buttery goodness over the noodles.

For more efficient mixing and less dishes, use the container the pasta already sits in.

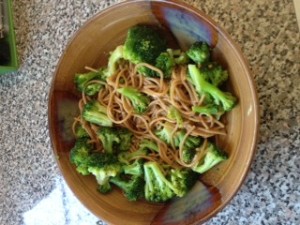
Wait about 3 hours for the noodles to chill and spoon into bowl (you can also eat directly from the container. No judging). I added broccoli for some extra nutrition and flavor. And also to not waste the broccoli in the fridge.

A bowl of peanut buttery deliciousness.

[yumprint-recipe id=’1′] 

Filed Under: Cooking, Life, Pioneer Project, Recipes Tagged With: food, pioneer traits, recipes

The Pioneer Kitchen Diaries: Tomato Vegetable Soup

February 7, 2014 by Jana 5 Comments

To me, one of the basic tenets of pioneer living is making do with what you have. After all, in those days, if you ran out of meat or potatoes, you couldn’t just hop on your horse and swiftly ride into town to get more. The nearest town was usually several miles away and shooting and eating your horse was not at all an option because there goes your transportation to said far away town.

That would make everything even more difficult.

This was especially true in the winter. In the book The Long Winter, the Ingalls family is basically trapped in their house due to weather and, even if they could get outside, there wouldn’t be anything to buy because trains couldn’t get into town (at this point, they had a house in town) to deliver supplies. So they had to use what they had if they wanted to eat.

I’ve experienced something similar lately.

I don’t know what the weather is like in your part of the world, but here on the East Coast, it’s horrible. Snow, ice, freezing rain, wind chills making it feel below zero…it’s the opposite of pleasant. It makes you not want to leave the house. And, if you live in my neighborhood that’s sort of in the middle of nowhere and that neighborhood is the land that snow plows forgot, you kind of get stuck. Especially if you don’t have an SUV or 4 wheel drive car.

You know, the modern equivalent of a horse.

So even if you wanted to go somewhere, you couldn’t. And after a few days, cabin fever sets in and food starts to run low. But getting to the supermarket isn’t easy (and they’re probably out of bread and milk anyway) so, like the pioneers, you have to make due with what you have.

That’s where my tomato vegetable soup comes in. I normally have a recipe for tomato soup and a separate one for vegetable soup but I was out of broth and decided to combine the two for something a little different. That also might have come from a place of boredom but we’ll just pretend it came from a place of experimentation.

To make the soup, I looked in my pantry and freezer where I found a can of crushed tomatoes, a bag of mixed frozen vegetables, a can of diced tomatoes, some garlic, vegetable oil, and salt. And water but that came from the faucet. I also had some crushed red pepper on hand for a little kick ( water and red pepper not pictured).

20140206-195840.jpg

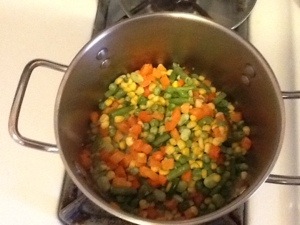
Then I sort of sautéed the vegetables and garlic in some vegetable oil.

20140206-211029.jpg

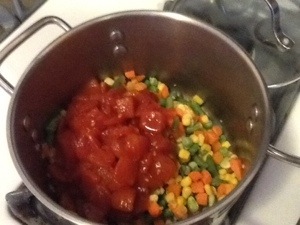
After a few minutes, I dumped in a can of undrained, unseasoned tomatoes

20140206-211038.jpg

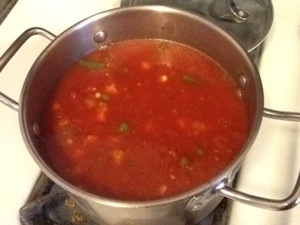
I mixed that up, and added in a 28 oz can of crushed tomatoes and 2 1/2 cups water along with roughly 1/2 tsp crushed red pepper

20140206-211046.jpg

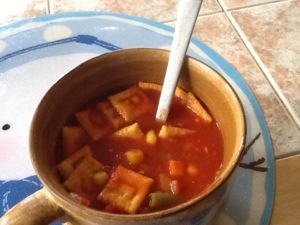
When it was all done and cooked, I ladled it into a large bowl and topped it off with Cheez Its (because I am gourmet and classy like that)

20140206-211052.jpg

This made enough for roughly 4-6 lunches, depending on how much you eat at a time. My husband added some leftover brown rice and didn’t complain (at least not to my face).

The soup left me feeling full and resourceful. Just like a pioneer on the cold winter prairie.

Townhouse Pioneer What’s Left in the House Tomato Vegetable Soup

Makes approximately 4-6 servings

Ingredients

  • 28 oz can crushed tomatoes
  • 16 oz bag frozen mixed vegetables
  • 14 oz can diced tomatoes, undrained
  • 2 1/2 cups water
  • Minced garlic, roughly 1 tbsp
  • Crushed red pepper, salt, pepper (to taste)
  • 1 tbsp vegetable oil

Directions

  1. Heat vegetable oil in pan
  2. Add in garlic and mixed vegetables. Sautée for a few minutes, until vegetables start to thaw and soften.
  3. Add in undrained tomatoes.
  4. Stir in crushed tomatoes and water.
  5. Heat through. While soup is heating, add in optional spices (note: add at least a bit of salt. Trust me on this one).

Serve with crackers, cheese, sandwiches, or whatever else you feel like.

Filed Under: Cooking, Life, Pioneer Project, Recipes Tagged With: Little House on the Prairie, pantry foods, soups

The Pioneer Kitchen Diaries: Conquering applesauce

February 2, 2014 by Jana 7 Comments

When I started outlining this project, where to start, and what it would encompass, I knew a huge part of it would be about food. Growing it, cooking it, eating it, canning it, composting it, and thinking about it. From my research (and by research, I mean playing The Oregon Trail and reading the Little House books), it seems as if pioneers spent an exorbitant amount of time on their food. I suppose this has to do with the fact that a good portion of their day was consumed with it. Mainly because of how long it took to cook and prepare everything.

So that intimidated me. Also intimidating was what they ate. Honestly, I’m repulsed by the concept of everything cooked in pork fat and let’s not even discuss some of the meat that they ate. This is perhaps part of why I’d starve if thrust into that situation now. But if this project were to progress, I knew I had to start somewhere (and maybe work myself up into cooking something in bacon fat. I doubt it but we’ll check in on that in a few months). So I decided to start with something simple–applesauce.

I’m not sure if applesauce is even a traditional pioneer food but I think they must’ve eaten canned apples and applesauce is kind of the same thing. At least, I’m deciding that it is. It’s also fairly uncomplicated to make which fits my criteria for “official first Towhouse Pioneer project”.

I had tried one recipe and it turned out…well, not so great. Thankfully, Pinterest exists and I took to it immediately. I searched for applesauce recipes and the results were, well, plentiful. Amidst the results, I saw Ree Drummond’s (aka The Pioneer Woman) recipe and I figured that a recipe by The Pioneer Woman would be a) delicious because most of her recipes are and b) fitting for my first project of this nature. So I pulled up the recipe and off I went.

To say I was pleased with the results is an understatement. This shit turned out fantastic! That Pioneer Woman seriously knows what she’s talking about. I don’t even like applesauce and I couldn’t stop eating it. It tasted like apple pie filling rather than the grocery store jarred stuff. I did make some modifications, like using cinnamon sugar, Golden Delicious apples rather than a mix, and I didn’t puree it. I left it with some chunks (side note, I hate this word. It reminds me of puke and also the fat kid from the Goonies. I like him and all but the Truffle Shuffle is not exactly conducive to garnering an appetite) since my husband and daughter prefer chunky applesauce.

The final product lasted 48 hours. Half of it was gone before it even made it into the mason jars. It was that good.

In case you want to make it yourself, here’s what you do:

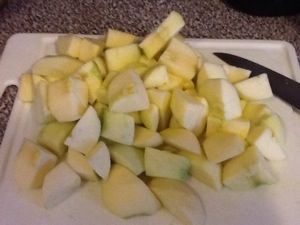
Peel, core, and slice 3 pounds of Golden Delicious apples
20140202-141711.jpg

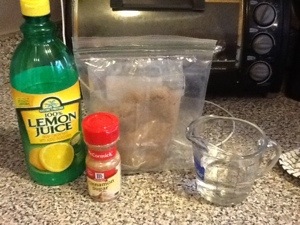
Add water, brown sugar, cinnamon sugar, and lemon juice
20140202-141757.jpg

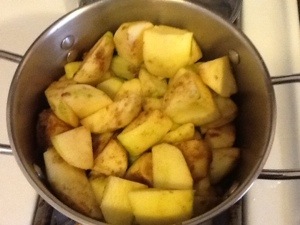
Boil apples, sugar, water, cinnamon, and lemon juice for 20-25 minutes, until apples are soft
20140202-141806.jpg

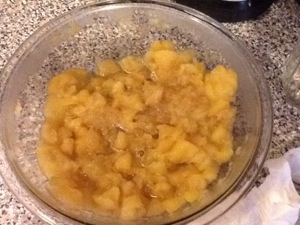
Spoon apples and some liquid into a bowl and mash until apples are broken into pieces
20140202-141817.jpg

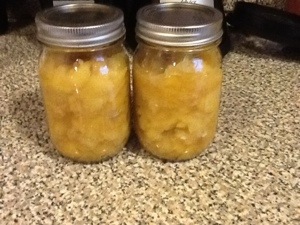
Pour finished product into mason jars and store in fridge until ready to use
20140202-141825.jpg

Pioneer Project applesauce (adapted from The Pioneer Woman)

Makes approximately 6 servings.

Ingredients

  • 3 pounds Golden Delicious apples, peeled, cored, and sliced
  • 1/2 cup water
  •  1 1/2 tablespoons lemon juice
  • 1/4 cup Brown Sugar, Packed
  • 1 teaspoon cinnamon sugar, More Or Less To Taste

Directions

  1. Combine all ingredients in a large pot and cook over medium heat, stirring occasionally, for 20-25 minutes.
  2. When apples are soft, spoon into bowl with some liquid and mash with potato masher until slices are broken up into pieces. You can also put in a blender and puree if you want a smoother consistency.
  3. Store in the fridge in mason jars or other storage containers. I’m not sure how long it lasts because in my house, it disappears within hours.


Filed Under: Cooking, Life, Pioneer Project, Recipes Tagged With: canning, fruit, mason jars

Jana

I'm Jana ...

A book reading, nail polish wearing, binge watching, music loving, dog owning, reluctant cheer mom.
Learn more ...
  • Bloglovin
  • Email
  • Facebook
  • Instagram
  • Pinterest
  • RSS
  • Twitter

Generic selectors
Exact matches only
Search in title
Search in content
Search in posts
Search in pages
Filter by Categories
Activities
beginnings
bills
bloggers
Books
budget
challenges
charity
Confessions
Cooking
coupons
Crafting
entertainment
Family
Family matters
food
Gardening
Giveaways
goals
Guest posts
guests
Home Decorating
Life
mental health
Money
Money Motivation
money moves
money tips
Money Tune Tuesday
opinions
parties
Pets
Pioneer Project
products
quotes
random
Random thoughts
recipes
Recipes
Relationships
savings
school
Sewing
shopping
Sidebar Shots
Uncategorized
work
writing

Archives

Reader favorites

Sorry. No data so far.

Show Us Your Books. Join the Link-Up. Talk Books the Second Tuesday of Every Month

Connect with Me

Subscribe to Jana Says

Jana Says
© 2017 by Jana Says. All Rights Reserved.
Crafted with by sasspurrella designs.

Copyright © 2025 · Lifestyle Pro Theme on Genesis Framework · WordPress · Log in